 Ah…Chicken Quarters…
They are often such a great price at the store, much less money than for the drumsticks or thighs broken down already.
…But what to do with them? They are big and clunky for kids. Many people just find them to be too “labor-some” on their plates to eat, or they “creep” them out – believe it…I’ve heard it before.
So, here’s how to solve your dilemma! You are going to buy those darn chicken quarters and bring them home, and here’s what you do with them before you store them for future use, or cook for dinner.
As I implied above, chicken quarters are made up of 2 parts: chicken drumstick, chicken thigh. That’s what a chicken quarter is. At the joint is where the drumstick & thigh connect.
You are going to want to use a sharp knife to accomplish this. It is dangerous to use dull knives because the force & pressure you apply to complete your tasks causes you to run the risk of slipping & injuring yourself greatly. Sharp knives are the way to go, but also be careful & work slowly with sharp knives, if you’re not used to them. Today, I am using my 10″ Mercer Renaissance Chef Knife from ProChefGearPlus.com.
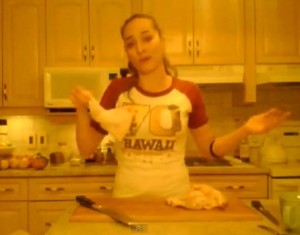
Here’s What to Do in this cooking tutorial – written instructions below:
Technique:
- Rinse chicken quarters under cold water and pat dry with clean, dry paper towels.
- Take one chicken quarter, and hold it by the drumstick end making a V with the quarter, open side up.
- Take your sharp knife and slice in the center of the V towards the bottom until you reach a hard joint with bones.
- Grab the chicken quarter on each end with your hands and force the joint to pop by pushing away from you at the joint.
- Once the joint pops, it will release from each other and allow you to take your sharp knife and continue cutting through to the other end making 2 pieces: the drumstick, and the thigh.
- Repeat for as many chicken quarters as you have.
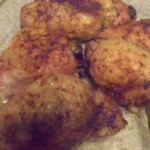
- Either cook with your chicken drumsticks and thighs, or store them for future use in the freezer.
Storage:
- My favorite way to store chicken in the freezer is in large plastic, resealable freezer bags. That way you can see what is inside the bag and how much you’re working with.
***
I hope you enjoyed this How to Cook Video on Cooking with Kimberly. Until next time…
Eat Deliciously!
Knives: ProChefGearPlus.com
Similar Posts:
- How to Roast Perfect Taste Hot Mango Ginger Chicken + Video
- How to Grill Napa Valley Pomegranate White Balsamic Chicken + Video
- How to Roast Smoked Paprika Chicken Quarters
- How to Cook Kimberly’s Jamaican Jerk Chicken Recipe
- How to Slow Roast Chicken with the Best Skin Ever + Video