 If you haven’t used fresh pumpkin to cook before, it’s well worth the effort.
With a little bit of elbow grease, you can have that pumpkin broken down and disassembled in no time.
Reserve the seeds for roasting, and you’ll have a healthy, tasty snack too.
You can use this pumpkin, now, to cook down for pumpkin pie filling, grill or roast chunks of flesh on the BBQ or in the oven. Adding pumpkin to soups & stews thickens up the broth and makes it hearty too.
A great side dish you may not have thought about before!
How to Clean a Pumpkin – Break Down & Disassemble:
- You will start off by washing your pumpkin clean.
- Using a sharp, sturdy knife, preferably about half the size of a chef’s knife, just for ease of use, and safety purposes. * Tip: BE VERY CAREFUL at ALL TIMES using a sharp knife! Pumpkins are very thick, irregularly shaped, and can difficult to deal with when cutting. The larger the pumpkin, the more difficult it is to cut. Take your time!
- Gripping the stem, if at all possible, cut around the stem in a circle, using a slanted angle towards the stem, so that this piece will lift out of the pumpkin easily. * Tip: If the pumpkin is particularly thick, use your knife making an insertion, removing the knife, and moving it next to that insertion along the circular cut you will make. Try to connect the knife cuts.
- Remove the “top”. Using a sharp chef’s knife, cut as close to the skin as possible and remove any flesh from the “top” that can be used.
- Cut pumpkin in half lengthwise, first, starting on one side, turning & cutting down the other side. * Tip: If you are unable to cut all the way through the bottom, you’ll be able to grab each side of the pumpkin on the inside lip of the top cut, and pull both sides apart. This will break the thick flesh through the bottom, leaving you with two halves.
- Scrape out all pumpkin innards, if desired, separating the seeds from the veins. Reserve the seeds and roast for a tasty & healthy snack.
- Cut slices again through each side of the pumpkin and into useable chunks.
- If you’re roasting or grilling the pumpkin, leave skin on the pumpkin to cook. Score the skin prior to cooking.
- If you’re adding to soups, stews, other dishes, or you’re making pumpkin pie filling, cut the skin off the pieces of pumpkin flesh.
So, I hope that now you’ll be more apt to buy a pumpkin to use for cooking, instead of one lonely Jack O’ Lantern every year.
Now, you know how to clean a pumpkin, break it down and disassemble it.
***
I hope you enjoy this Pumpkin Tutorial on Cooking with Kimberly. Until next time…
Be a Champion in Your Kitchen & Eat Deliciously!
Similar Posts:
- How to Grill Pumpkin on the BBQ + Video
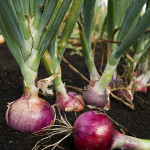
- How to Dice an Onion Properly
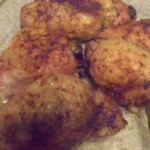
- How to Separate Chicken Quarters into Drumsticks & Thighs
- Web Chef Review: Ontario Sugar Pumpkins at Harvest Barn Country Markets
- How to Roast Acorn Squash + Video


Trackbacks/Pingbacks